Shading & dilution
Picture this: It's been two hours and you just did your best set of microbladed brows and you and your client are both thrilled. You can't wait for her return in a few weeks to see those gorgeous healed brows.
Finally, the day comes around, she walks into your office, and guess what? Only 50% of her colour was retained and now you have to redo her brows all over again and hope for the best. We've all been there, and it's disappointing, to say the least. The truth is, microblading only yields very soft results and is usually not defined enough for many clients.
Before I developed my signature Blade and Shade method, the above scenario was very typical in most, if not all of my cases. I always told my clients that Microblading was a two-step process because a lot of the original colour would likely be lost and that I would need that second appointment to add more colour and density to the design.
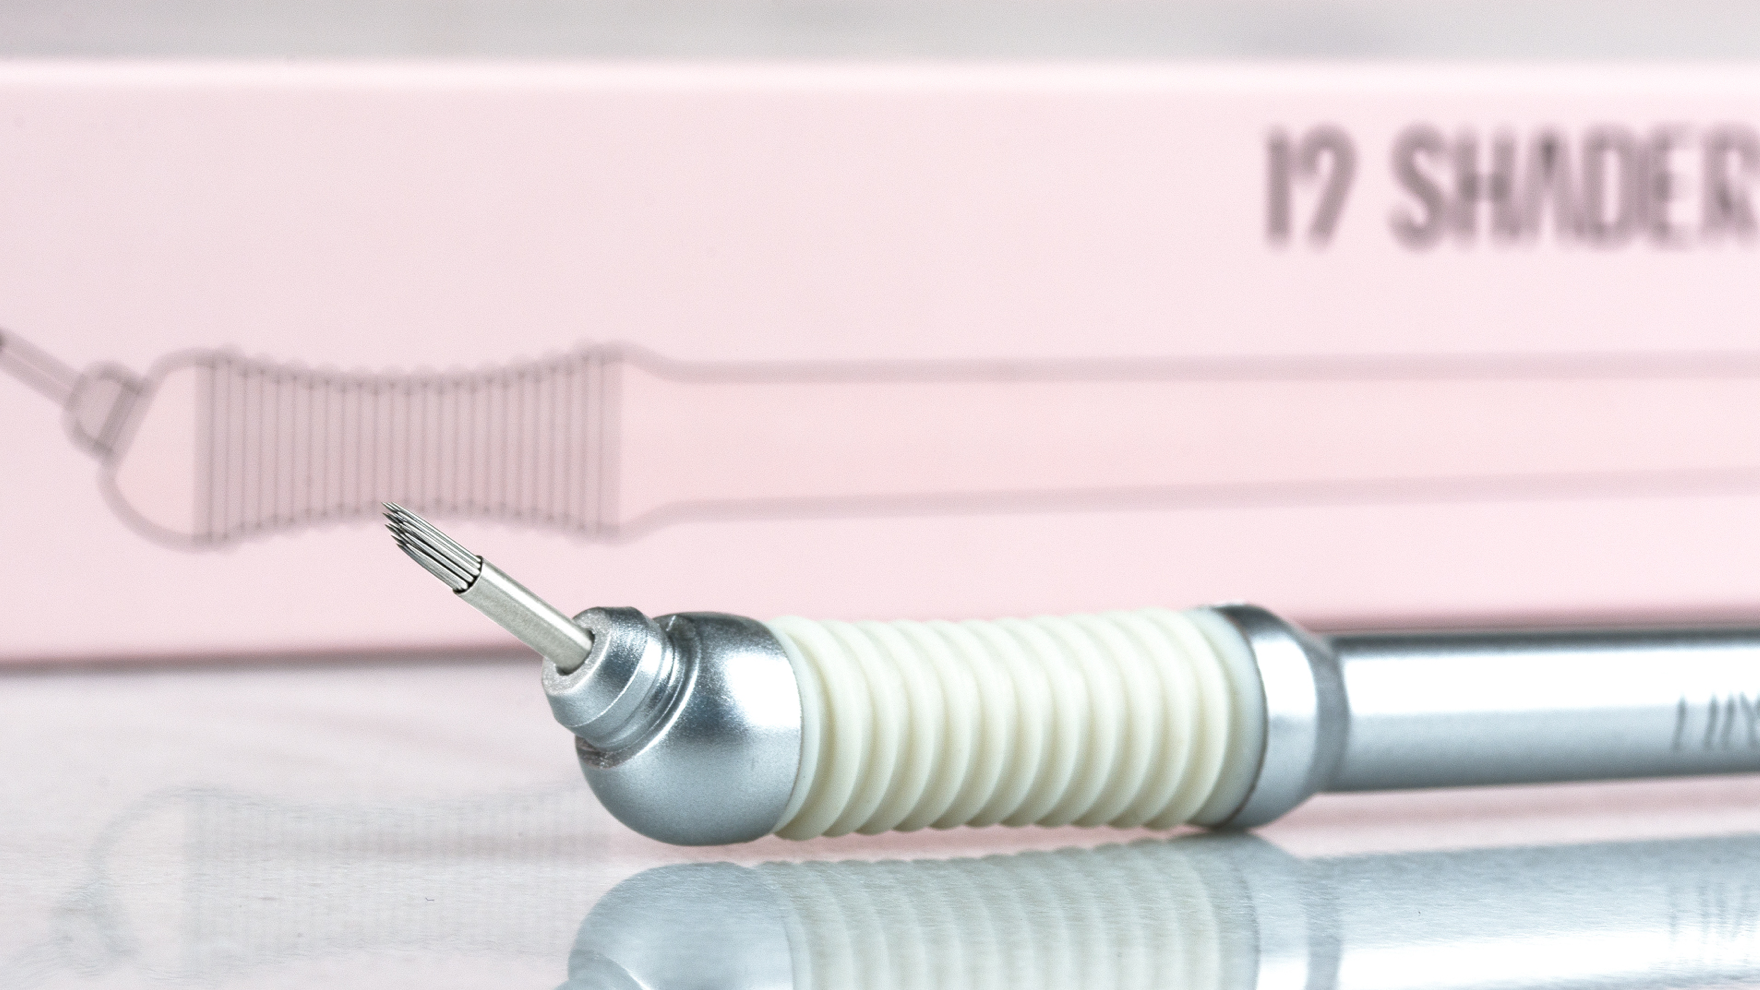
Luckily that all changed for me with the help of my 19 Shader and The Tina Davies X Permablend I❤️INK Pigments!

Tina shading with the 19 Shader Microblade
By combining microblading AND shading in one appointment, and using this ultra-concentrated formula of inks, I am able to get up to 90% colour retention at that first appointment, which leaves very little extra work for me to do at the follow-up appointment. Not to mention my clients are thrilled!
- Tina
Check out Brianna's eyebrows after blade and shade below!

Healed Blade & Shade Brows, I❤️INK Bold Brown
Following up on our "What is Blade & Shade?" blog post, we wanted to expand on the topic further to bring you even more insights as to when it may be a good time to pick up your favourite Tina Davies Microblade + 19 Shader to finally create the gorgeous brows your clients want, get you busier, and to cut your procedure time in half.
We’ve received a lot of questions around shading dilution, including how to properly dilute pigment, why we use a specific shading solution to dilute pigment, how much to dilute your pigment, as well as how to properly use the 19 Shader microblade. Below we've gone through and answered your top questions:
Q. When do I shade?
A. The following clients are ideal for the Blade & Shade technique:
Clients with little to no real hair. You'll want to create the look of density AND hair strokes to give the impact that is missing from the lack of hair. Oftentimes, this goal cannot be achieved by microbladed hair strokes alone.
When the brows are patchy and/or coarse with a lot of missing areas such as the front, tails, or general thinness. By microblading hair strokes, then adding shading, the transitional area from hair to no hair will be less detectable and more seamless.
Clients who want a bolder, filled in brow. Microblading alone yields a subtle, natural look, so often clients are frustrated that they still need to fill in their brows with a pencil or powder. Microblading + shading will provide that extra "pop" and definition creating a 2-dimensional look.
When you want to get the most out of your first appointment. If you're tired of microblading being a 2-step process and want your clients to heal with 90-100% colour retention, adding shading will do the trick. If you're having problems with retention or need to do a powdered brow look for those candidates who just don't handle microblading well, shading is the answer you've been looking for. The key is to dilute pigment for that soft, ombré look clients love.
Q. What is shading solution and do I have to use a shading solution to dilute my pigment?
A. Shading solution will dilute your pigment and lessen the pigment load, this means your pigment will be a lighter version of itself. We often get asked, “Can't I just use distilled water to dilute the pigment?”, no, we do not recommend this. Shading solution will ensure that your mixture stays suspended and properly diluted, preventing the pigment from separating from the dilution liquid while you work. Be sure to mix with a pigment mixer.
Q. Can I adjust my pressure to shade instead?
A. Technically, yes, but we do not recommend it unless you are a VERY experienced and skilled microblader. You can adjust your pressure and stipple lightly using the 19 Shader microblade to control the amount of pigment you deposit, but if you don't go deep enough, you will not hit the "sweet spot," and therefore the pigment will not stay in the skin. It is much easier to make errors using this method, leaving you with too much or too little colour in certain areas. Using diluted pigment to shade allows you to deposit the colour consistently into that sweet spot for more even, seamless results without oversaturating.
Q. How do I properly dilute pigment for manual shading?
A. The general rule of thumb for diluting pigment is to dilute the pigment by at least 50%-80% with a shading solution to start for MANUAL shading. For machine shading, it is not necessary to dilute your pigment as you can control the level of saturation with your pressure, number of passes and needle configuration.
This means the majority of your mixture will be shading solution, not pigment. This 50%-80% rule will vary depending on how much pigment you have used, the concentration, and your cup size. i.e. 8 drops shading solution, 2 drops pigment. Be sure to mix with a pigment mixer. It is recommended to dilute the pigment at a higher percentage to allow you to build to your desired outcome. High dilution is especially necessary when working at the tails of the brows where the skin is at its thinnest.
Note: If you choose to dilute using a machine, we recommend 30%-50%.
The Tina Davies x Permablend I❤️INK Pigment Set comes with it's own shading solution in the kit!
Watch How Tina Dilutes Pigment Here:
Q. Why dilute by 50 to 80 percent?
A. The goal of shading is to create a sheer or shadowed effect behind the microbladed strokes for a 2-dimensional look. The brow will have soft edges created by microblading PLUS impact created by the shading. You want to avoid a fully solid brow which looks very flat.
Q. How do I use the 19 Shader?
A. The 19 Shader is an angled needle, shaped in a round formation, it is to be used in a flicking or stippling movement, unlike the microblading motion of dragging along the skin. However, the technique is the same as other microblades in the sense that it must still penetrate into the dermis in order for the skin to retain the pigment.
Q. Is diluted pigment messy?
A. Because you are adding more liquid to your pigment, it will be a little messier! Luckily we have our Pigment Cup Ring so they don't spill over. The pigment ring includes a custom sponge that will absorb the liquid and prevent spillage! Wipe clean to check your deposit.

Pigment Ring with Sponge
Q: How can I learn Tina’s Blade & Shade Technique?
A: Enrol in the Tina Davies Blade & Shade Online Course where Tina demonstrates her signature Blade & Shade technique! Learn how to give clients both the realism of fluffy, natural hair strokes and extra definition by adding shading.
Tina will explain the technical expertise involved in proper depth, angle, pressure, and the elusive three-point stretch. Plus, explain her aftercare instructions, how to safely dispose of needles, pigment preparation and much more! See a variety of healed results along with challenging quizzes, assignments and downloadable cheat sheets throughout the course to boost your learning. Click here to start learning today!
Get started with the right tools, we've got you covered with everything you need to master Blade & Shade!


1 comment
Thank You so much, I have truly learned more threw these lessons than I did the 3 days !
Krista Stewart
Leave a comment
This site is protected by hCaptcha and the hCaptcha Privacy Policy and Terms of Service apply.