Microblading: My Healing Journey
Microblading and Microshading Healing Day-by-Day

Let me start by saying permanent makeup is something I have found to be fascinating for a long time. Whether it’s aiding in shaving some time off of someone’s morning makeup routine, or giving them eyebrows where they had none before - I’ve watched it change lives and instill confidence in people time and time again. I find it to be so fascinating in fact, that I took the plunge to get it done myself almost 3 years ago, and up until recently, swore I would never do it again.
If you’re confused about how I can be so fascinated with the art of permanent makeup, yet ready to swear it off all together, let me introduce myself. Hi, I’m the product of a poor microblading experience. I know saying “poor experience” will make your mind jump to the worst - crazy dark brows, infection, excruciating pain, oh my! But alas no, I luckily didn’t have to suffer through an experience that bad.
3 years ago I had a friend enter the exciting world of microblading with hopes to pursue it as a career. Wanting to support her business and having already been intrigued by the procedure for some time, I booked myself an appointment. I’d never had any PMU procedures done prior to this appointment, so I had no idea what I was getting myself into or what to expect.
There wasn’t much of a consultation, but she carried herself very professionally and confidently throughout the entirety of the appointment which helped to put me at ease. When it was all said and done, I left with brows I was satisfied, but not overly in love with. I wasn’t given too much information on what healing would be like, so for the next few weeks I found myself in a constant state of panic, thinking I’d completely ruined my face. When my brows had finally healed, I felt the shape and colour didn’t compliment my face as best as it could and as the years passed, I was left with eyebrows that had faded to a faint light pink/red. My mistake was feeling too bad to mention my displeasure, and instead deciding this was a procedure I would avoid going forward, assuming I just wasn’t the right candidate for it.
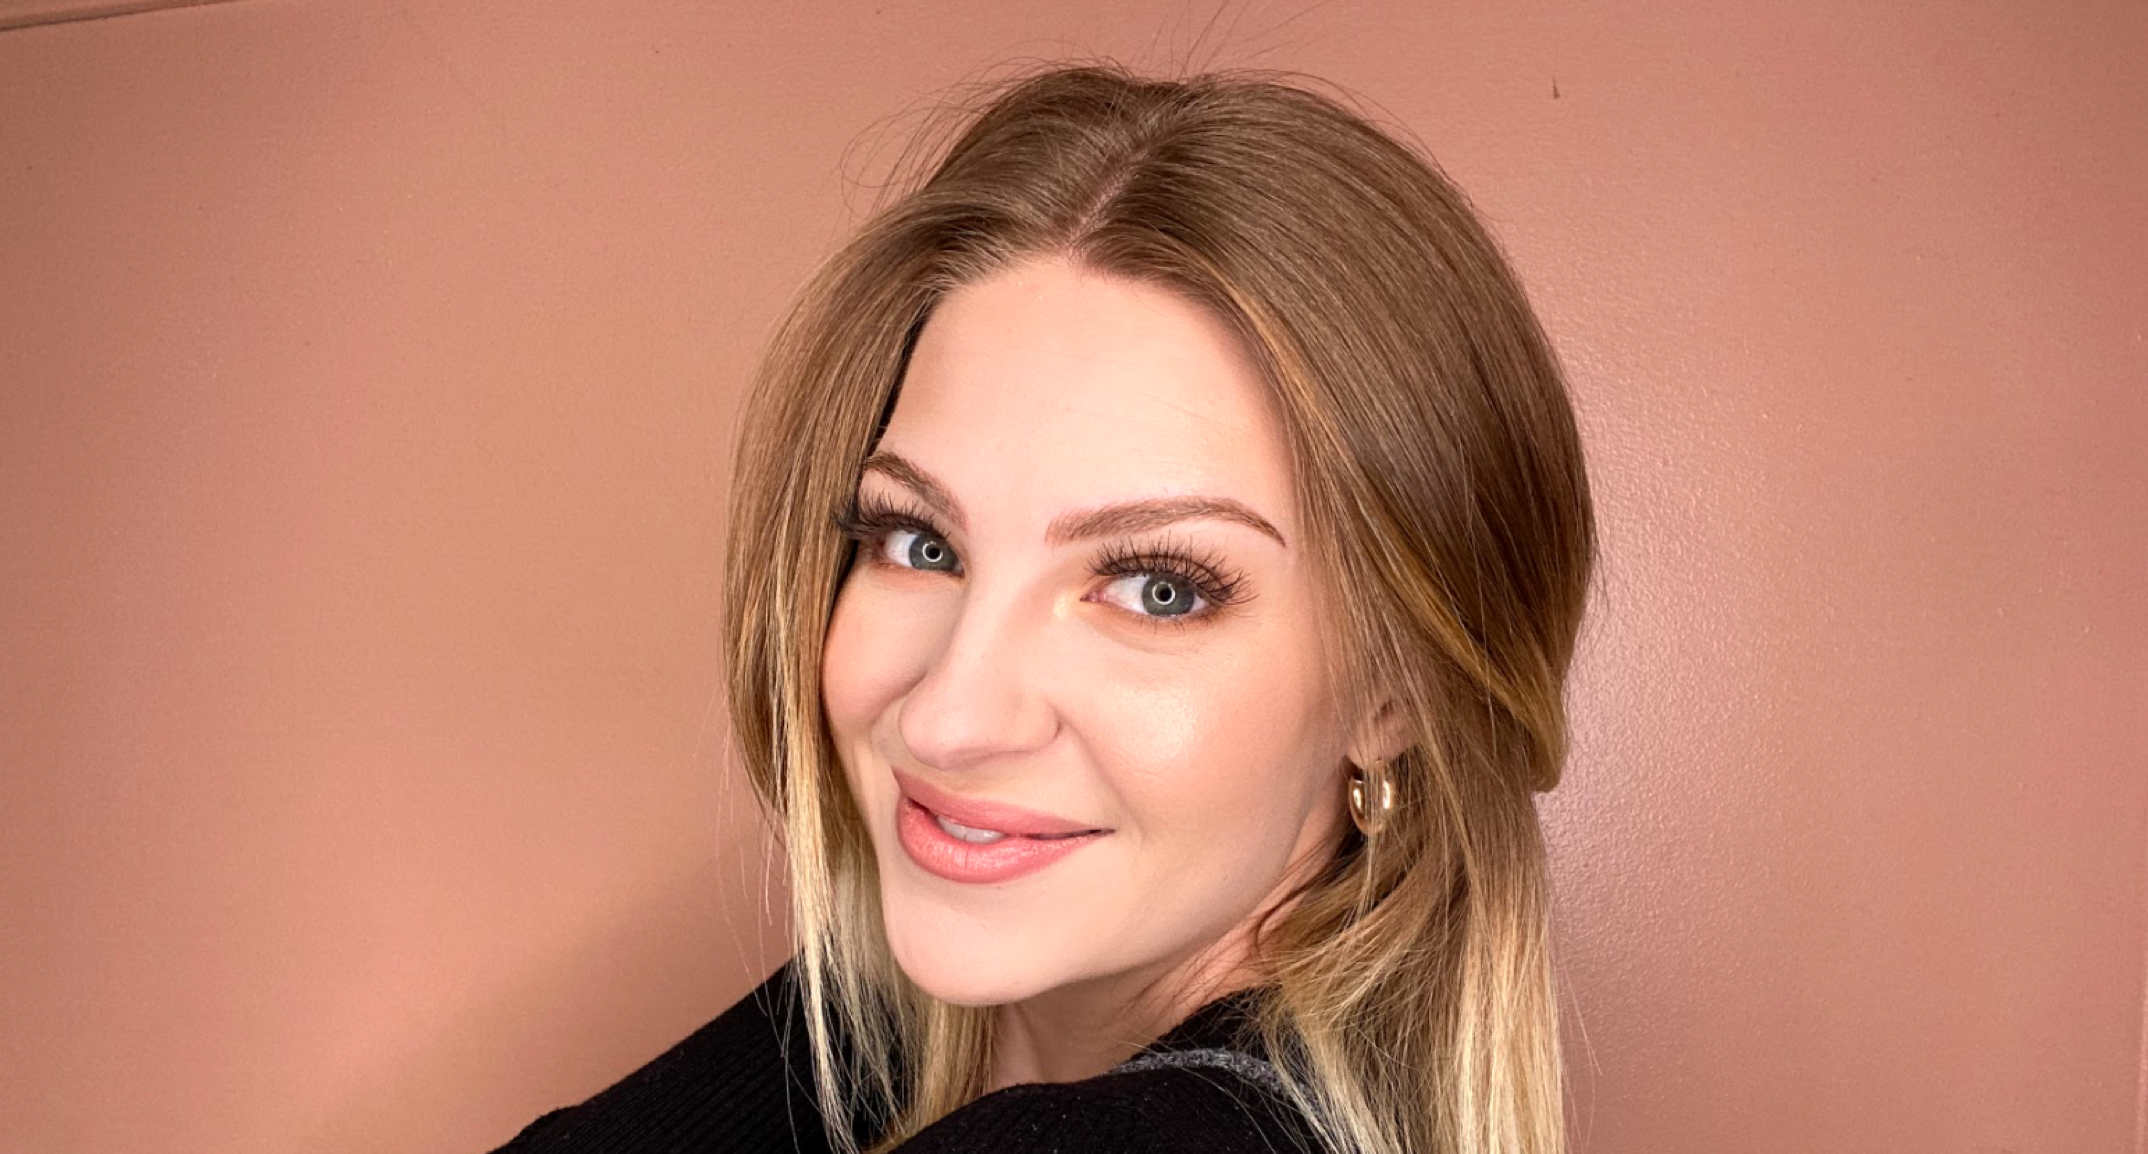
 Almost 3 years post first microblading procedure
Day 1
Almost more than I was, Tina was overjoyed and SO excited. So much so, that she almost had me forget entirely about the nerves I was feeling towards having this done again. Her passion for her work is half of what makes this such a fun experience for her clients.

Tina and I during my consultation
As stated previously, there wasn’t much of a consultation the first time I’d had this done, so the in-depth consultation I had with Tina was a whole new experience that aided in putting me at ease. She listened to all of my wants and desires for my eyebrows, and provided me with her professional opinion on what would be needed to achieve it. I’d shared with Tina that I wanted a look that fell somewhere between a natural looking brow, and a fuller filled-in brow. We bounced ideas back and forth, I shared some inspiration photos with her, and we finally came to the conclusion that a combination of microblading with the U Needle Signature Microblade and microshading with a machine on the tail ends of my brows, would give me the look I desired.
 Tina and I referencing my inspiration photo and the colour chart
Tina suggested we use Dark Brown and Blonde from the I Love Ink Collection to achieve this look; Dark Brown to create the hair strokes and Blonde to shade the tails of my brows with to create a bit of a fuller look. My hair colour is more of a light/medium brown, with some hints of red, so you can see why hearing this suggestion came as a surprise to me at first. I couldn’t hold my shock in and responded with “Dark brown?! Are you sure that wouldn’t be too dark?” Tina reassured me by holding the colour chart up next to my face in the mirror, helping me see how close dark brown actually was to my natural hair colour. She explained to me that the hair strokes she would be creating would be very fine to give a look that wouldn’t appear too bold, but fuller in a natural way. I felt so much better after she’d explained her colour choice to me, and we continued onto the procedure.

Tina Davies x Perma Blend Dark Brown

Tina Davies x Perma Blend Blonde

Tina Davies x Perma Blend I Love Ink Colour Chart
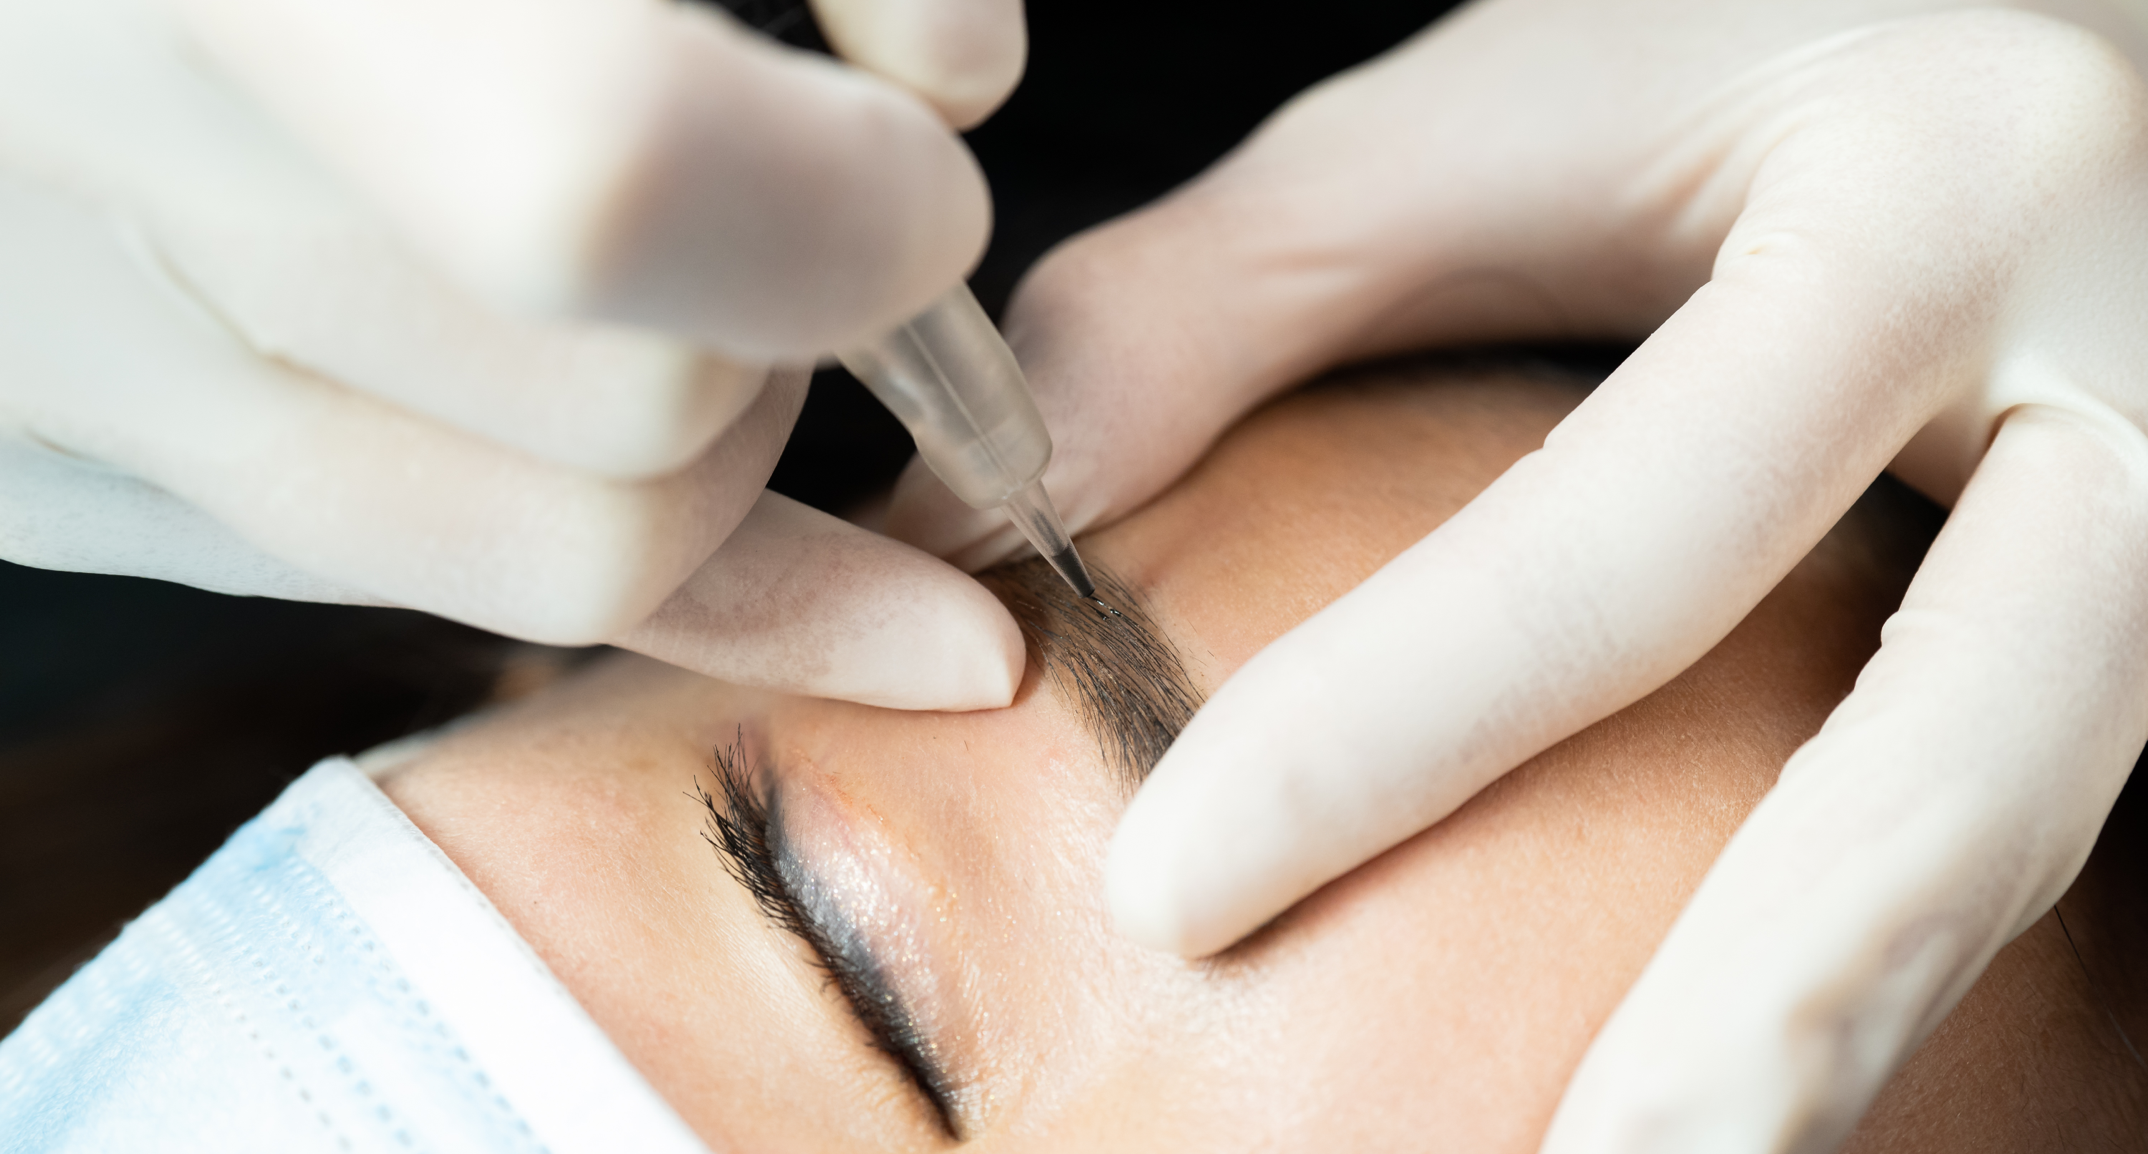
After numbing for about 20 minutes, we were ready to get started. I laid down on the procedure table, my heart feeling like it was pounding out of my chest. Here we go, we’re really doing this, there’s no turning back. I had a MUCH better feeling this time around of what my outcome would be; I’d agreed on and seen the colours that were going to be used, and Tina had drawn on my brows to show me how the shape would look, but I couldn’t help but still be a little bit nervous. I closed my eyes and took a deep breath, bracing myself for the pain.
Tina starts microblading and I feel… barely anything at all. I know that’s probably hard to believe, I was in shock myself. I couldn’t believe how numb Zensa had made my brows. The topical numbing started wearing away when she was finishing up the first pass of my eyebrows, at which point a secondary numbing was applied. If I thought I was barely feeling anything before, this secondary numbing agent was a game changer. The only way I knew Tina was still microblading was by the sound of needles against my skin.
About a half hour goes by, and before I know it, we’re done. I’d become calm and relaxed over the past half hour, but once Tina handed me a mirror, I felt my heart starting to race again. I was about to see the eyebrows I’d be wearing everyday for the next few years. I take another deep breath and open my eyes. WOW.

Immediately post-procedure
When I say wow, I mean wow. I could not stop repeating it over and over again while looking at myself in the mirror. My brows looked incredible. I was shocked, astonished, blown away; you name it, I was feeling it. The outcome was above and beyond what I could’ve imagined. I was finally the one feeling this new found confidence.

My fresh brows with Tina Davies
Before I left the studio, Tina went over with me one more time what healing would be like. Now you may wonder, how long does it take for microblading to heal? She let me know it will take 30 days for the full healing process and broke down what to expect throughout. Tina then thoroughly walked me through the best way to wash my brows and apply my aftercare, then sent me off with a goodie bag that included all natural soap, aftercare and an instruction card, and a What to Expect While Healing brochure that broke down all healing stages to come over the next 30 days. I left the studio ecstatic.
 Aftercare goodie bag from Tina Davies Studio
As the night progressed, my eyebrows slowly grew more sore, finally feeling the effects of what felt like a bunch of tiny paper cuts, resulting in a pretty gnarly headache. I gently washed my brows as instructed, applied my aftercare gel, and crawled into bed to wrap up day one.
Day 2
 Day 2
Day 2
I woke up feeling the kind of excited a child would feel to go to DisneyLand, but just to look at my eyebrows again in the mirror - I couldn’t believe how much they’d already changed just overnight. They’d darkened in colour, thickened in shape, and had taken on more of a reddish appearance. I’m used to filling my eyebrows in on a daily basis, so seeing this didn’t come as a huge shock to me. However, to the person who doesn’t typically do much to their brows, looking in the mirror on day 2 may feel a bit terrifying. I took a look at my healing brochure and refrained from panicking, as everything I was experiencing was written in front of me as regular and to be expected effects on day 2.
 Day 2
Day 2
I continued with my aftercare 3 times a day following the guidance the card that came along with it was giving me to continue this process for the first 5 days of healing. This part of my day quickly became my saving grace, providing me cooling relief to my tender and tight brows.
Day 3-4

Day 5
 Day 5
Day 5
Day 6-8
 Day 8
Day 8 Day 8
Day 8When I say my eyebrows were itchy, I mean want to scratch them off your face “itchy”. It took everything in me to resist the urge to go to town on them, but I was aiming for some beautiful healed brows and had been advised by my brochure to still refrain from touching. So, refraining from touching is what I did. I’d be lying, however, if I said I didn’t go to bed every night hoping and praying that I’d wake up the next day with itchless brows.
Day 9-10

 Day 10
Day 14-21

Day 21
 Day 21
Day 30
 Day 30, fully healed
I’D MADE IT! My brows were fully healed and beautiful; as presumed, not much change had taken place since day 21.
As much as I’d hoped for and looked forward to the healing process ending throughout, I have to say this is an experience I feel extremely lucky and fortunate to have had. I can’t believe I now get to just wake up in the morning with eyebrows that look like this.
Bottom line being - if you find yourself in the same shoes of previously having had a poor microblading experience and are teetering on the fence of whether or not to give it another go, DO IT but do it different this time. You can never do too much research when it comes to finding a person to tattoo your face. Sometimes we mix a certificate with experience, and assume that just because someone is certified, they’ll be able to provide us with award winning services. An artist that is passionate about providing their clients with the best service possible will continue to educate themselves beyond a 2 day course to be able to expand their knowledge on the fundamentals and broaden their technique.
Now, this isn’t to say you should never see a beginner artist - but if you choose to, it’s important to manage your expectations. Understand that we all have to start somewhere, and that a beginner will still have some learning curves they’re working through. Although they may not be able to give you celebrity brows quite yet, they’ll be insanely grateful for your trust, time, and money.
Some helpful tips to be prepared with when seeing a beginner artist that will help improve your experience as well as aid them in becoming a better artist are:
- Bring an inspiration photo(s). Doing this will help the artist to understand exactly the look you’re trying to achieve, and will avoid there being any miscommunication between the 2 of you.
- Ask the artist to explain their colour choice to you, and ensure you approve it. Remember you are the one having this procedure done, and these are the brows you’ll be walking around with for the next 2-3 years. It’s important the colour choice is something you’re going to feel good about.
- Ask for detailed healing instructions, and what you can expect over the next 30 days. The healing process can be a scary time, especially if you don’t know what you’re in for.
- Don’t be afraid to ASK QUESTIONS! The more knowledge you have around this procedure and what’s going to take place, the more comfortable you’re going to feel getting it done, and the happier you’ll feel leaving the artists studio.
I can’t say thank you enough to Tina for restoring my faith in PMU and providing me with these drool-worthy brows. Getting good PMU feels a lot like getting a good hair colouring, or a sweet tattoo; it makes you want to go back for more. Lip blushing, eyeliner - stay tuned….I might get it all!
 Before, immediately post-procedure, 30 days healed
Procedure Notes:
Technique: Combo brows a.k.a. hairstrokes with shadingFitzpatrick: Skin tone 2
Skin Type: Apple, non-oily
Colours Used: Tina Davies I LOVE INK Dark Brown for hairstokes and Tina Davies I LOVE INK Blonde for shading
Needles: Tina Davies U Needle Signature Microblade and Tatsoul 7 Curved Magnum
Artist: Tina Davies
1 comment
Such a helpful article. Helped me make a decision.
Micah
Leave a comment
This site is protected by hCaptcha and the hCaptcha Privacy Policy and Terms of Service apply.