Case Study: Super Fair Skin & Colour Selection

Healed brows using Tina Davies I LOVE INK Toffee
In today’s case study, we feature talented PMU artist Nani Polster who specializes in advanced microblading & shading, ombré brows, lip blushing, eyeliner tattoos and teaches private classes and is the owner of Glow Permanent Makeup.Nani shares with us how she was able to create natural and beautiful results for her Fitzpatrick 1 client with strawberry blonde hair. Fitzpatrick 1 clients often have thinner, more sensitive skin and much cooler undertones, which presents in pink/redness under the skin, making colour selection and technique very important. Adding the unique red hair to the equation, this can be a more challenging case for permanent makeup artists. Learn how Nani took each of these things into consideration and was able to achieve gorgeous healed results for her client.
Procedure Details
My gorgeous client, Bryanna, has a very light skin tone with beautiful hazel eyes and silky straight strawberry blonde hair. She informed me her skin always burns and never tans, which means her skin is going to be much more sensitive and very delicate, so I would need to watch my needle selection and technique.Being a full time nursing student and mother of two, she is super busy, hard working and has no time for herself. Creating a beautiful brow that looks natural yet a little defined will allow her to just wake up and go.
Client Goal
My client’s desired results were for a fuller, softer brow with a visible arch and a natural, yet defined look.Her eyebrows were naturally full throughout the entire brow, however, the tails were low and pointed downwards. Since she was requesting more visible arches, I would need to raise it slightly and create that subtle lifted look.
 Before
Design Approach
To create the fluffy yet defined look my client desired, I decided to do strokes in the front and shading throughout the brow for the perfect combo brow.I began by mapping out the shape of her brow and creating a soft arch, ensuring symmetry on both sides. Always get your clients final approval on the shape.

Brow Mapping Pre-Draw
As we know, skin structure and type play a big role in the outcome and end results. It is very important to start off by identifying your clients Fitzpatrick level and undertones!My client had a Fitzpatrick skin type 1, so she is going to have much cooler undertones, which presents in pink/redness underneath the skin. To cancel out those cool tones, selecting a very warm pigment will ensure the colour heals perfectly and not too ashy.

Fitzpatrick skin scale
Using the handy Tina Davies Colour Chart, we selected Toffee from the Sunset Collection. We were a bit indecisive between the colours Toffee or Autumn, because she didn’t want to go too dark in the first round but she does like them bold, if you know what I mean.It seriously made my life a lot easier and less stressful using the colour chart that comes with the collection.
 Shop Tina Davies I Love Ink Sunset Collection Eyebrow Pigments
Technique(s) Required
To create a soft yet defined brow, a combination brow would be perfect. Fluffy hair strokes in the front and shading throughout the rest. This requires a variety of techniques, such as whipping, pendulum and dotting (or pixelating).Since I could tell immediately that Bryanna has very delicate skin, I knew it was important not to overwork her skin by going too deep. Working on sensitive skin will typically result in redness and swelling, as well as minor bleeding. I will need to be mindful to control my hand pressure, keep it steady and ensure that I do not force the pigment implantation.
Plan of Action
For my outline, I began whip-shading, along with a layering technique, which keeps it soft but makes it visible enough for me to see it. It’s harder to blend the pigment, if the outline is darker, particularly on very fair skin like hers.I added a few strokes in the front of each brow to create a fluffy look, then started my first pass with a very quick grazing all over the brows, just to open up the skin, but also making sure to get some of the pigment implanted if possible. I let the pigment sit with the secondary numbing gel, and moved to complete the first pass on the other brow.
After wiping off the pigment, I noticed her skin retained the pigment quite well with no bleeding. This is a good sign, as I know I probably won't need more than 2½ to 3 passes to complete.
With sensitive skin, it is important not to overwork, so upon seeing lymph and/or blood I gently wiped as I worked on each section and applied a secondary numbing gel in order to help reduce bleeding. There was some redness and some pinpoints of blood, but she was very calm and relaxed.
Pro Tip: In most cases, if the client bleeds during the procedure, inform them that bleeding can cause patchy/uneven healing results beforehand, so they know what to expect.
After two passes, it was time for me to go into more of the details. I make sure when I work that I see all my pixelation. If there is blood or lymph, I wipe away and leave that area alone for a second; you don’t want to work on the wet and moist areas, as the colour won’t be able to get underneath the skin! It is a waste of time and what’s worse is that it can cause more damage to the skin.
Pro Tip: Wipe in sections, to make sure you can see your work; even if it's faint, the colour will get darker as it rests in the skin. Don’t do more than one pass until you wipe. Just remember less is more for this skin type!
With each pass, I let the pigment sit and, when I’m about to finish the other brow, I wipe away with a damp cotton pad and apply a secondary numbing gel. After 2½ passes, I let her colour sit for five minutes for better saturation.
At the end, when I did a 5 minute pigment mask, instead of using Toffee, I used Autumn to add a tiny bit of dark warm red, as I knew she didn’t mind having them slightly darker too. I don’t know if it’s just me or not, but I could tell that by adding a darker shade at this end stage would create a smoother, deeper and more evened-out brow just the way we wanted!
Once again I had the client sit up to check the shape and symmetry. Since everything looked good, I had her lay back down one last time. At this time, I checked the retention and corrected any missing spots which I went over quickly with the pendulum technique or dotting in a small area to help for blending
Pro Tip: Dim the light when making corrections and, most of the time, you can find out if one brow is darker than the other.

Immediately after
I use witch hazel or Tina Davies Aftercare Healing Gel at the end of the process with a Q-Tip, to help reduce bleeding and/or redness. It helps to soothe any irritation.Pro Tip: Keep it in the fridge for additional cooling sensation.
 Shop Tina Davies Aftercare Healing Gel

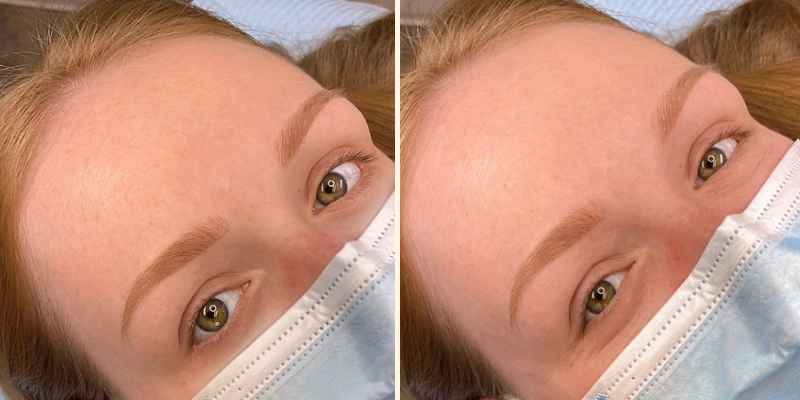
Before & immediately after
 Before & immediately after
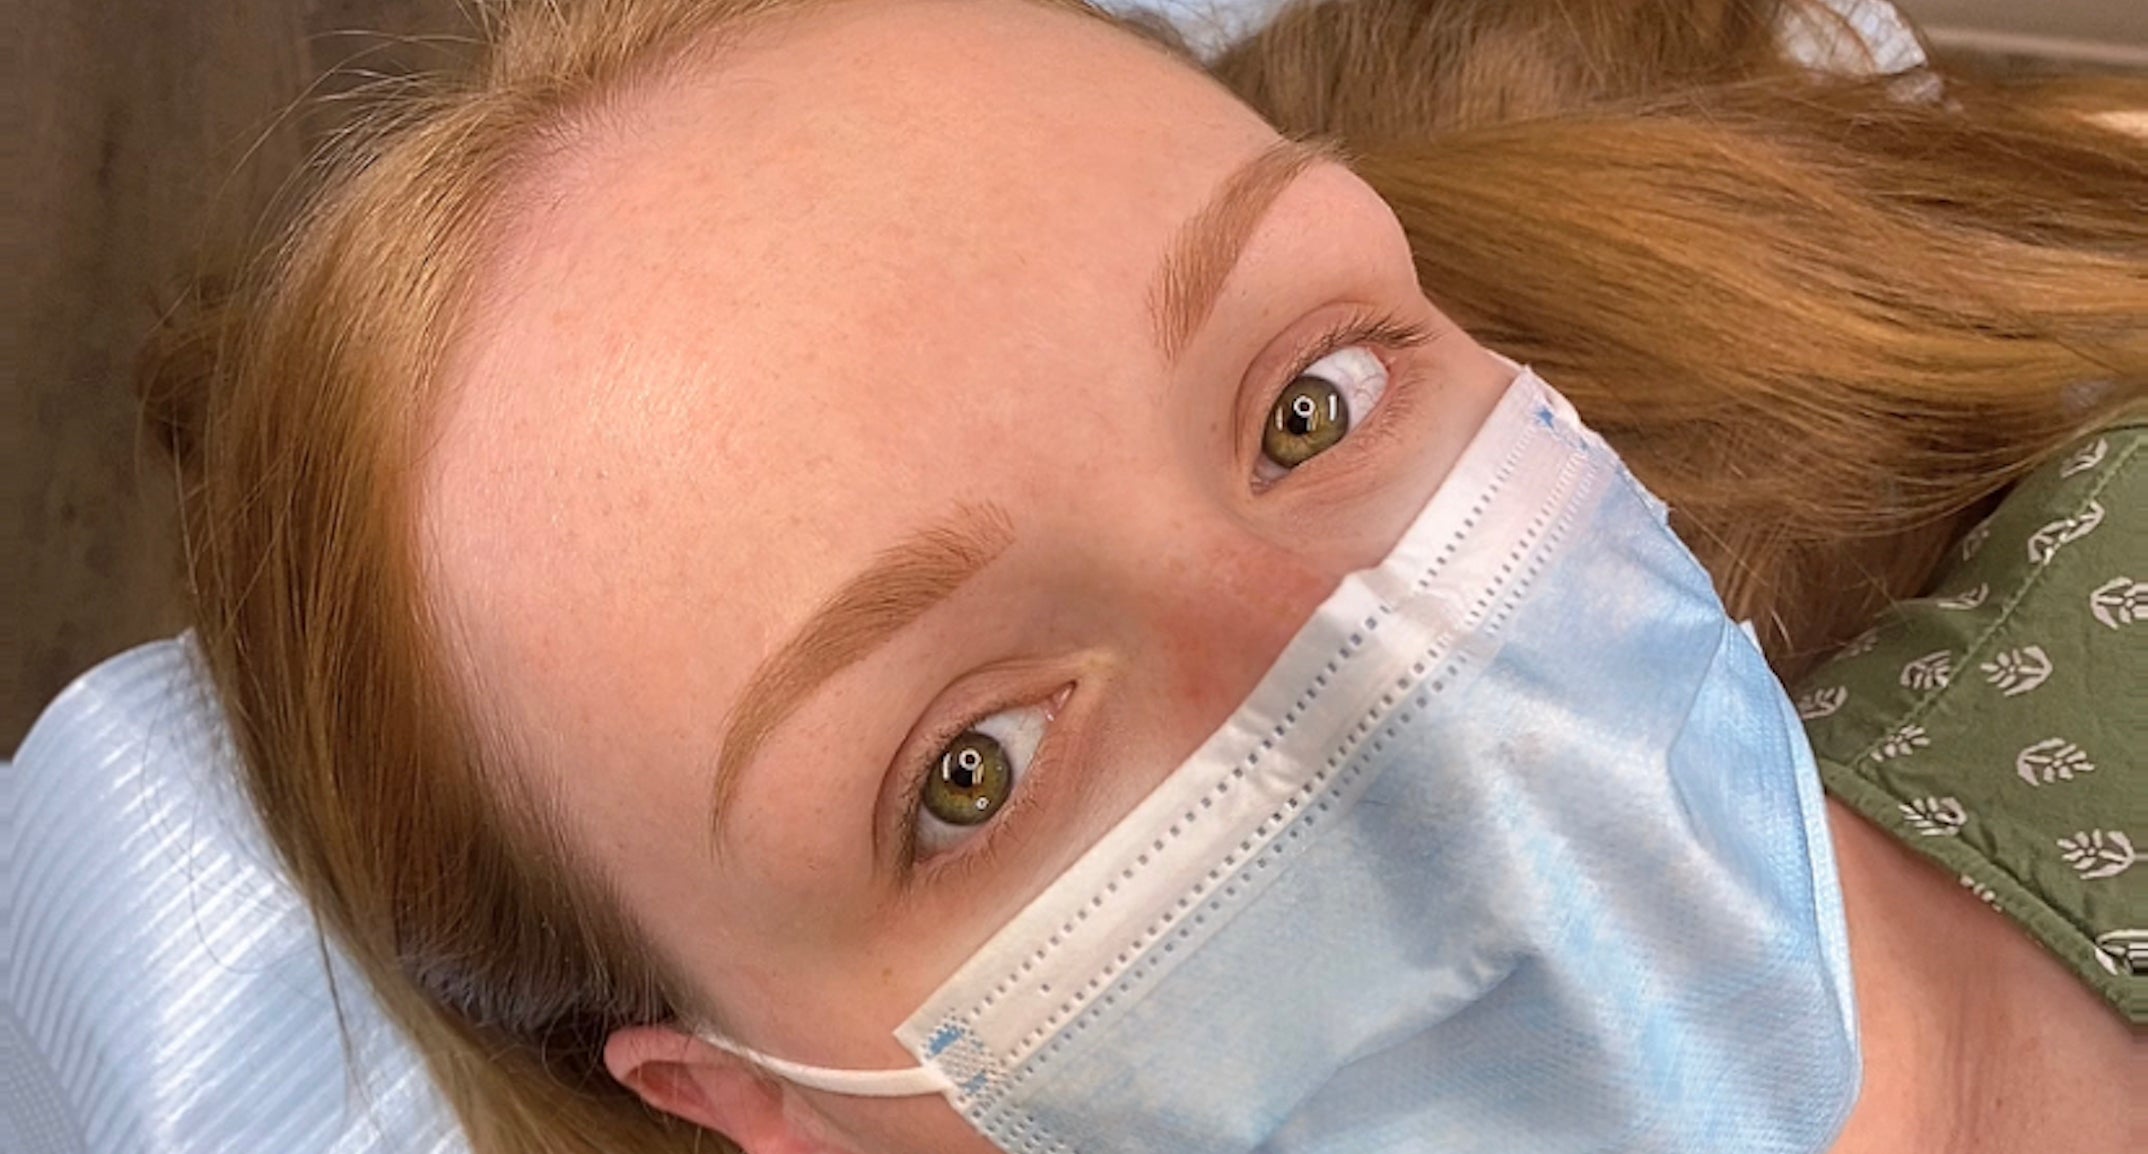
Healed
 Healed
Procedure Notes
Technique: Combination BrowsFitzpatrick: 1
Skin type: Normal, thin, sensitive and very delicate
Pigments: Tina Davies I Love Ink Toffee Brow Pigment and pigment mask with Tina Davies I Love Ink Autumn Brow Pigment
Needle: .30mm 1RL
Artist: Nani Polster

Owner, 'Nani,' has been in the beauty industry for nearly ten years. She has a bachelor’s degree in education and is a 2010 Cosmetology graduate of the Brown Aveda Institute. After working in a salon and spa for several years, she decided to follow her passion of focusing on microblading. Shortly thereafter, she began taking numerous classes for certification and later started her own business. She enjoys continuing her education in this field, in order to keep up with the latest trends and constantly improve her skills, to give her clients the beautiful brows they deserve.
“I hope my story proves useful to anyone out there who finds themselves in a similar situation. Rest assured that you can’t go wrong with Tina Davies’ pigments which make PMU more possible than ever for all artists out there.”
- Nani Polster

Leave a comment
This site is protected by hCaptcha and the hCaptcha Privacy Policy and Terms of Service apply.